For BoB, the 'somewhere' was with some sound damping material. I'd read many different ideas and options for the stuff. Different brands, thicknesses, styles, and application methods and coverage. Found a commentary from the SprinterForums from someone that used material from Reckhorn. Looked good, sounded good, priced good; so I went with it.
You can see the roll of it there. Easy stuff to work with. Thin aluminum sheet on one side, adhesive butyl-like stuff on the other side. No off-gassing smells either, a definite bonus.
I would be putting enough heavy stuff into the build later on, so I didn't want to be doing full coverage with the stuff. Besides, most things I read said that's not really needed to get your best 'bang for the buck' sound reduction. I started on the wheelwells as they were noticeably the noisiest part of the van while driving along. Filled in the spaces between the stamped areas.
It wasn't silent, and the actual decibel reading would probably be the same, but it certainly changed the tone. Far less 'tinny' now. I went on and did the same thing to the wall panels and ceiling, but with not as much coverage.
Next up was the insulation. My design idea was to use a Thinsulate and Prodex/Low-E combination. Thinsulate directly on the walls, also helping to tone down the sound. And then later in the build have the Prodex attached to the back side of the wall panels, thus providing the bit of air gap it needs to be a effective.
Thinsulate was obtained from Hein; a fairly well known builder that frequents the SprinterForums, but also occasionally seen at the Transit and ProMaster forums as well. He's in Hood River, just a few hours from me, so I picked up a 50' roll of Thinsulate in person. Actually, I picked it up in April 2015; I didn't even take delivery of BoB until June 2015. So yeah... had a big roll of Thinsulate hanging out in the garage for a few months.
Thinsulate was trimmed to fit every area possible, then held in place with 3M 90 spray adhesive. Note that carefully. 3M 90 spray adhesive. Not the 70. The 90. Works great, and stuff is NOT coming off.
Where it couldn't be sprayed in place, it was rolled up and pulled into place. I would fish a solid core copper wire through various structural ribs, use that to pull a string back through. With a bowline knot I would loop around itself and cinch to the end of a strip of Thinsulate and pull that back through. Worked great. Another spot that I did not spray in place was in the front area over the cab where the cab roof lights are located. I wanted to be able to get to those in the future for replacing a lightbulb. So that is just held in place with the factory headliner.
I don't have many great pictures of just the insulation, but you'll see it for quite awhile yet. Its currently end of May 2015 as I write this, and I only recently put up two ceiling panels. Otherwise its still exposed Thinsulate. This is also another way of saying that the black scrim layer on the Thinsulate holds up really well to general wear and tear.
That last picture shows the start of the floor 'system'.
Started off filling the gaps between the ribs with closed cell (aka minicell) foam. It was just a bit taller than the spaces, the idea being that I could float plywood on top of them. That almost worked, they compressed too much. So... I put down a full sheet of minicell over top of that, then the plywood. The plywood is bolted in place at the factory tie down locations. I think there were four pieces used, with seams going across the van. One cut around the wheelwells, one full panel up front, one to fill in, and a narrow one at the back.
Last time I'll be able to load plywood like this. Sure was easy though.
That's me,being a doofus with the leaf blower. Though it has turned out to be a wonderful tool during the build, works great to keep things clear of dust and debris.
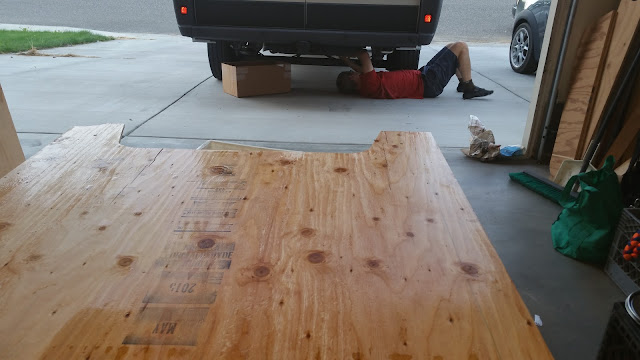
One plywood floor, ready to go.
Gotta make sure things get back in the right place. A few directional marks took care of that.
Its going to look like this for quite awhile. You can see that I had been working on the insulation as well.
Next up was going to be the closed-cell foam (aka minicell) underneath the plywood. The plan was to fill the ribs with foam thicker than the spacing and have the plywood float on that. Ended up that it squished down so the plywood was resting on the metal floor. Not wanting squeaks, and being up for any extra bit of insulation, I put down a full layer of minicell on top of it all, and then the plywood.
Its hot. I'm tired.
Yeah, this is comfy enough. (not really)
Foam and insulation.
Sealed with a few coats of polyurethane. It probably won't help if its saturated in water, but shouldn't be bothered by the occasional spill that might (will!) make it past the top flooring layers.
Overall I'm not using that much wood in this build. This is probably the biggest single use of it. I had it installed for awhile, then pulled it back out to put on a couple coats of water seal. Used it that way for a couple months before I started in on getting the floor structure built. That's when the purchase of the 80/20 aluminum arrived and the real fun began.


No comments:
Post a Comment