Oh, wait... it didn't. My first modification, well... addition, was something nice and simple. The universal garage door opener fits nicely at the center of the overhead bin. A bit of 3M velcro holds it in place.
With that done... now it was time to drill holes in the van. One of the first big purchases for BoB was some steps and a roof fan. I had watched much of the discussion on the forum about steps and running boards. I couldn't bring myself to the running boards, just don't like the overall look of them. But the Carr hoop steps will look just fine to me.
The other decision was the Maxxfan. Much of the time in my perusing about RV stuff I had read about the Fantastic fan. It seemed to be the 'default' fan to install. It seemed OK, but I wasn't thrilled with the lid. Then I started reading about the Maxxfan. Yes, the Fantastic fan has a rain sensor and will close on its own, but I really liked that the Maxxfan can stay open in the rain, or even open while driving. So, Maxxfan it was. And we went with the top of the list, including the remote. Yeah, its a small van but I figured it could be rather handy at times to have the remote at hand while in seated in the cab. And I knew that I be needing a rivnut tool throughout the build, so that was an early purchase as well.
 |
| Maxxfan Deluxe, Carr Hoops for the front, Carr Super Hoop for the slider, and an Astro Rivnut tool |
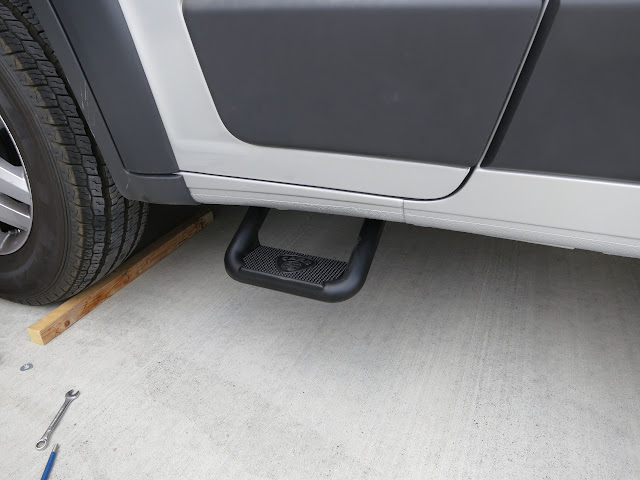
First up was the steps. We could get in and out OK, but a slightly lower first step would not be turned down. And thus the first holes drilled in BoB. At least they were out of sight.
Set them up about as high as they would go, really didn't want anything dragging or catching, even if it was right behind the front tire. Had a steep learning curve with the Rivnut tool, it really only likes to work when it has a directly straight access to the hole. I didn't have that. Ended up cobbling together a bolt and nut combination tool that I could use to tighten the rivnuts. Put the impact driver on it, worked fine.
Now it was time for the BIG hole. The Maxxfan. Gulp. But hey, it's all good... I got to buy a new tool for the job. Picked up a jigsaw to go with the rest of my Ryobi cordless tools. Worked great for this and many things since then.
So, it was time for lots of measuring, and then more measuring. And taping things off. And measure again. From both sides. And then finally... the holes.
Now it was time to close it up. Deciding to put the vent at the rear of the van, I didn't have a nice smooth surface for the flange to mount and seal. And this was before Hein had his PM roof adapter available. So... I made my own. I happened to have some scrap ABS plastic from previous projects, and it worked out to be just the right thickness after putting the butyl tape top and bottom. Chamfer the sides to match the roof ridges and it worked great.
With those in place, it was time to mount the flange and seal it all up. I just screwed the mounting flange straight to the roof metal, no wood frame or anything underneath. Having the roof well supported right on both sides, its is quite solid and stable. That, and I didn't think of it at the time. Dicor sealant was used to seal the Maxxfan flange around the edges and over the tops of the mounting screws. That stuff... it sticks to anything. Thankfully I really took my time and ended up with a nice clean bead of Dicor around everything.
So now I had a fan... with no power. And no pictures. ;)


No comments:
Post a Comment