Rack mounts, check.
Solar panels, check.
Roof wiring, check.
Batteries, umm...
Charge controller, umm...
Inverter, yeah...
Ok, time to get into rest of the electrical system. Not much use to just have some fancy looking solar panels on the roof and not be hooked into anything.
The whole layout for BoB has generally been in my mind and has changed some as I build out, but I did have some good general ideas for locating things. I knew that I wanted to have the electronics in the 'cabinet' area in front of and over the passenger side wheelwell. Didn't want to cram everything into a wee tiny space either, willing to give up some potentially useful space to allow a neater installation and better ventilation (especially for the inverter).
Initial test installation of the plywood backer panel that would hold all the electrical tidbits except the inverter. Bit of an odd shape, but it will fit nicely into the odd cabinet space that will be here.
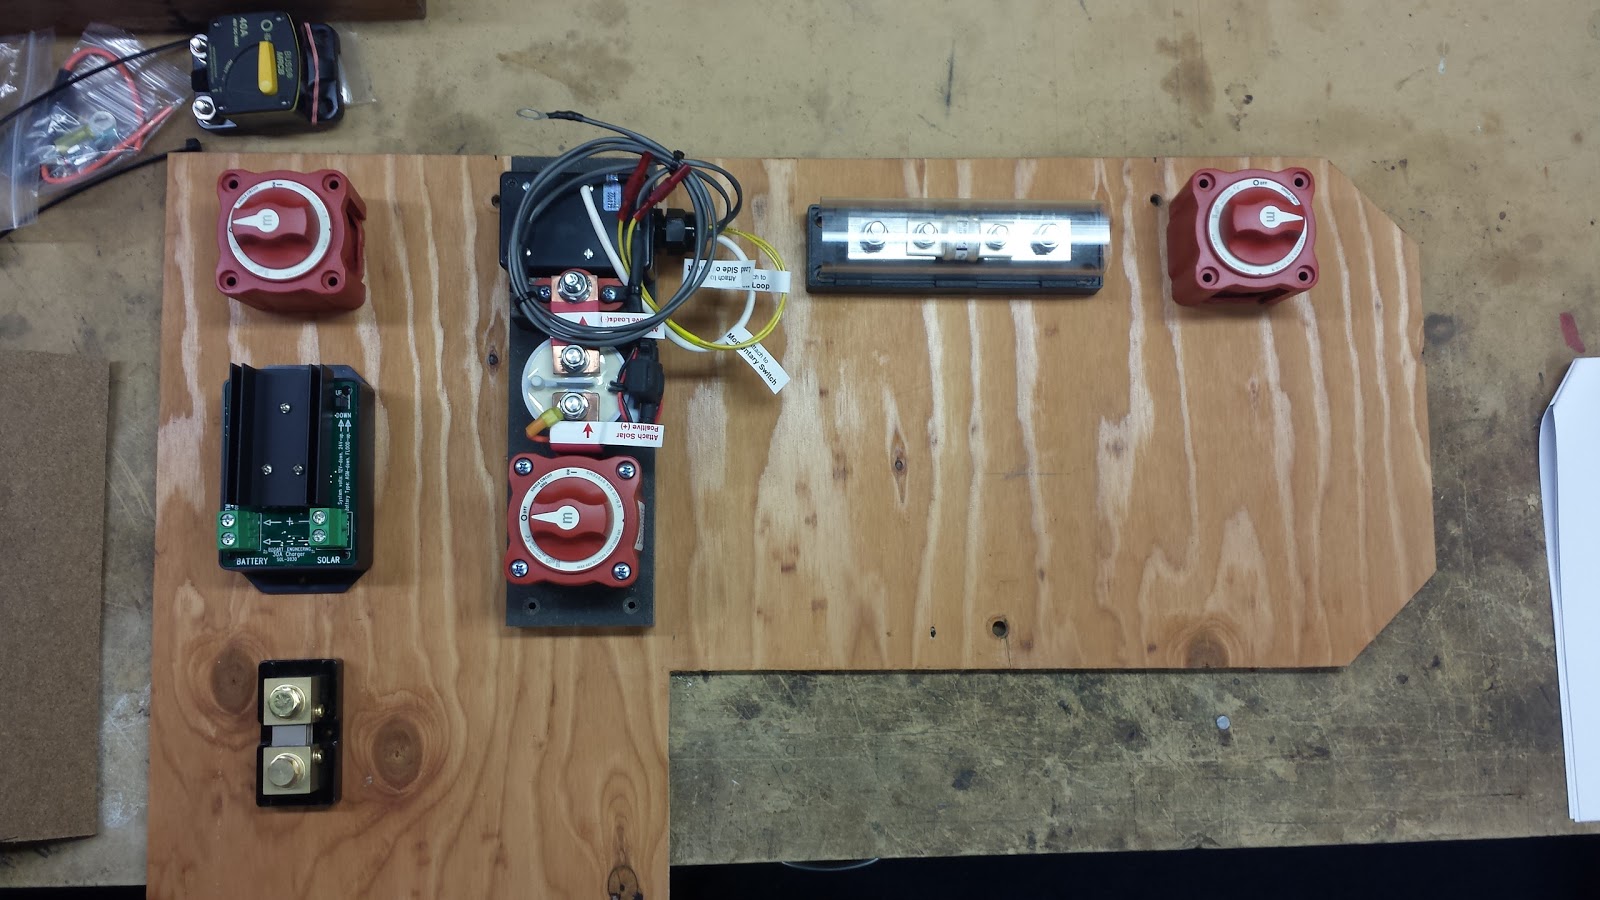
Initial bench layout of all the goodies.
And... the revised layout. (which would slightly change again after installation).
Top down, left to right:
- Solar panel disconnect
- TriMetric SC-2030 charge controller
- Shunt
- BMS board for the lithium batteries, provided by AM Solar (main power disconnect, main power relay, BMS black box)
- 40amp circuit breaker
- Reset button for BMS
- 200amp (?) slow burn fuse
- Inverter disconnect
Having previously made the decision to go with lithium batteries instead of AGM, I knew right where they would go. Remember the pictures awhile back of the cardboard box mockups under the van? yeah... that was the AGM idea, not happening. I ended up designing the width of the wheelwell box exactly around the width of the batteries. This could very well come back to haunt me in the future if/when I need to change batteries, but I'll deal with it then. In the meantime these are very securely held in place by a surround of 80/20 framing.
And here we are with most everything in place. The inverter will be on the shelf above the wheelwell.
Full view including the 4/2 wiring coming down from the combiner box.
This whole installation was done under a major time crunch. We had a road trip planned to have Thanksgiving in Albuquerque, departure date of November 17th. I started on the racks for the solar on October 31st, doing the first install on the 7th. The picture above was on the 11th. Nothing like a deadline for getting things done. And nothing like having your dad help out. One regret on this whole build so far has been not getting him more involved with stuff.
Checking the connector layout for the four battery cell pairs. 3 volt cells at 100ah each, paired up, then connected in series for a full 12V 200AH setup. I think the whole thing weighs about 60 pounds.
And the inverter/charger mounted. Went with a Magnum MMS1012, 1000w continuous rating, just enough to handle the nominal 700w microwave (tested it with a Kill-a-watt meter, knew that it actually drew 1000w). Our travel plans and lifestyle won't have us using anything larger than that, and the MMS1012 can handle a 1500w surge load for many minutes, enough for perhaps the espresso machine if we want to splurge for a weekend.
Dad worked for years in the nuclear industry as a quality control engineer, mostly in electrical. His dad was a lineman. I feel we could have done this much cleaner, but it is so much better than many other installations, and besides... deadline!
If your memory is good and eyes sharp you might notice the difference on the wiring board. Per recommendations from AM Solar we moved the inverter fuse to the other side of the disconnect switch.
Lots of clearance for access and cooling, though that means lots of 'dead space' when the cabinetry is finished. Ah well...
Putting in the temporary wiring panel. Needed to have something mounted for the 110v outlet and the fuses. Unfortunately its now 8 months later and not much has changed yet.
Got the BMS system wired up on the battery.
With the terminals exposed and the battery still open to the world, I went for a little bit of protection from dropping metal tools or other bits.
Mounted the battery monitor and inverter remote. Trimetric TM-2030 up top, works directly with the SC-2030 charge controller. Very simple setup, but very easy to customize and work with.
This is another panel that has become 'temporarily permanent'. Someday I'll figure out where they'll end up.
Changes to come in some of the electrical system hardware, but that's a tale to be told later.


No comments:
Post a Comment