By now it is the end of October 2015 (and I'm writing this mid-July 2016, so much for being current). In three weeks we were scheduled to leave for a Thanksgiving road trip from WA to NM. Time to get things going on the electrical side of things, as there is currently nothing there. For a couple reasons, it was time to enlist help from my dad. Partly for the mind and the manpower, and partly for his flat driveway.
We worked on bits of the electrical system at once, but for this I'll focus on the solar panels and their assorted goodies.
It starts with the mounting racks. The crossbars would be the usual 80/20 aluminum extrusions. The mounting towers were obtained from Hein, designed specifically to work with the 80/20 parts. The pads are held down with 3M VHB adhesive, nothing else.
Started with just a mock-up of the crossbars, trying to verify that I would have enough room for everything on the roof. Turned out that I wouldn't!
I was originally going to have four crossbars, with two panels mounted across each pair. Have a space in between in the middle of the van, place the combiner box there, and run the wiring in. I forgot to account for the curve at the front of the roof, this caused some annoyance for an afternoon.
Then I figured that I would share the middle crossbar and relocate the combiner box to the rear of the van. Maybe not ideal, and certainly not my intended plan, but I could make it work.
And that's the panel. One of four. Its a 160 watt, 18 volt panel, from Grape Solar, supplied by the good (no, great!) folks at AM Solar.
Knowing that my mounting method would leave the corners unsupported, I went for a bit of a 'paranoia' reinforcement method. Since the miters on the aluminum frames were not welded or joined, I did not want any extra forces going into the panel itself, so I decided to add on some aluminum L brackets.
Always a bit concerning drilling into expensive stuff, certainly didn't want to get into the back of the panels themselves.
Ah... one down, seven to go. No, not fifteen more; I was only putting these on the outside unsupported corners.
And secured with stainless hardware, nylock nuts on the back. Overkill? Likely... but not going to have any problems there.
Now it was time to head across town and make use of dad's flat driveway. Seemed oddly appropriate to be working with the solar panels on a wet and overcast day. It was drizzling on and off, rather annoying to start with, then we just got used to it.
Checking panel layout, one more time. Was also nice to have two good ladders; love those 'Little Giant' ladders.
The wiring goes... that way. Label and number everything possible. Also fun in the rain.
Really starting to get somewhere now. Making good use of the cardboard honeycomb packaging that was in with the panels, keeping the glass off the concrete.
Close-up of the mounting pad for the rack towers. Black part is 1/4" ABS plastic, with shouldered threaded brass inserts. The entire back of the pad is covered with 3M VHB tape. If you've used that stuff at all you know it doesn't take much to hold quite a bit. That much adhesive isn't going anywhere soon, especially since it should mostly be seeing shear forces from the wind loads. Not something I was worried about.
I would have six of the pads supporting the four panels and crossbars. Spaced things out so they were centered on top of the roof ridges.
Remember those nice aluminum L brackets that I added? Well... modifications were needed. The full length was interfering with the tower bracket. Time to take off all the bolts and brackets, cut 1" off one side, and then put them all back on. Gotta smile at delays like this.
That looks better, and still gives plenty of overkill support to the frame corners.
Always keeping things clean.
Resuming the project the next day, in the rain again.
All power cables cut to approximate length and either tied in place or ready to be. The panels had the standard MC4 type connections, but I had AM Solar convert those to regular bare wire ends. Then used their 10/2 duplex wiring to lead from each panel to the combiner box. Crimped connectors with sealant and then sealed shrink tube over that. The wiring ties are held on with 3M VHB tape, not going anywhere.
Now it was time to get things on the roof. Missed a few photos of the sequence, but its hard to remember to keep the camera going when you just want to get things done. We set the crossbars in place and then bolted the panels on the right side. The panels bolt to tabs bolted to the underside of the crossbars (visible in previous pictures). We lifted the right side to get underneath to access the bolts. Then repeated that on the left side. It was a helluva stretch to the middle of the van while trying to fit underneath the panels.
Working in the rain again. Such fun.
Though raindrops to make for neat pictures of the solar panels.
Starting to get a feeling now on just how massive this solar panel array really is.
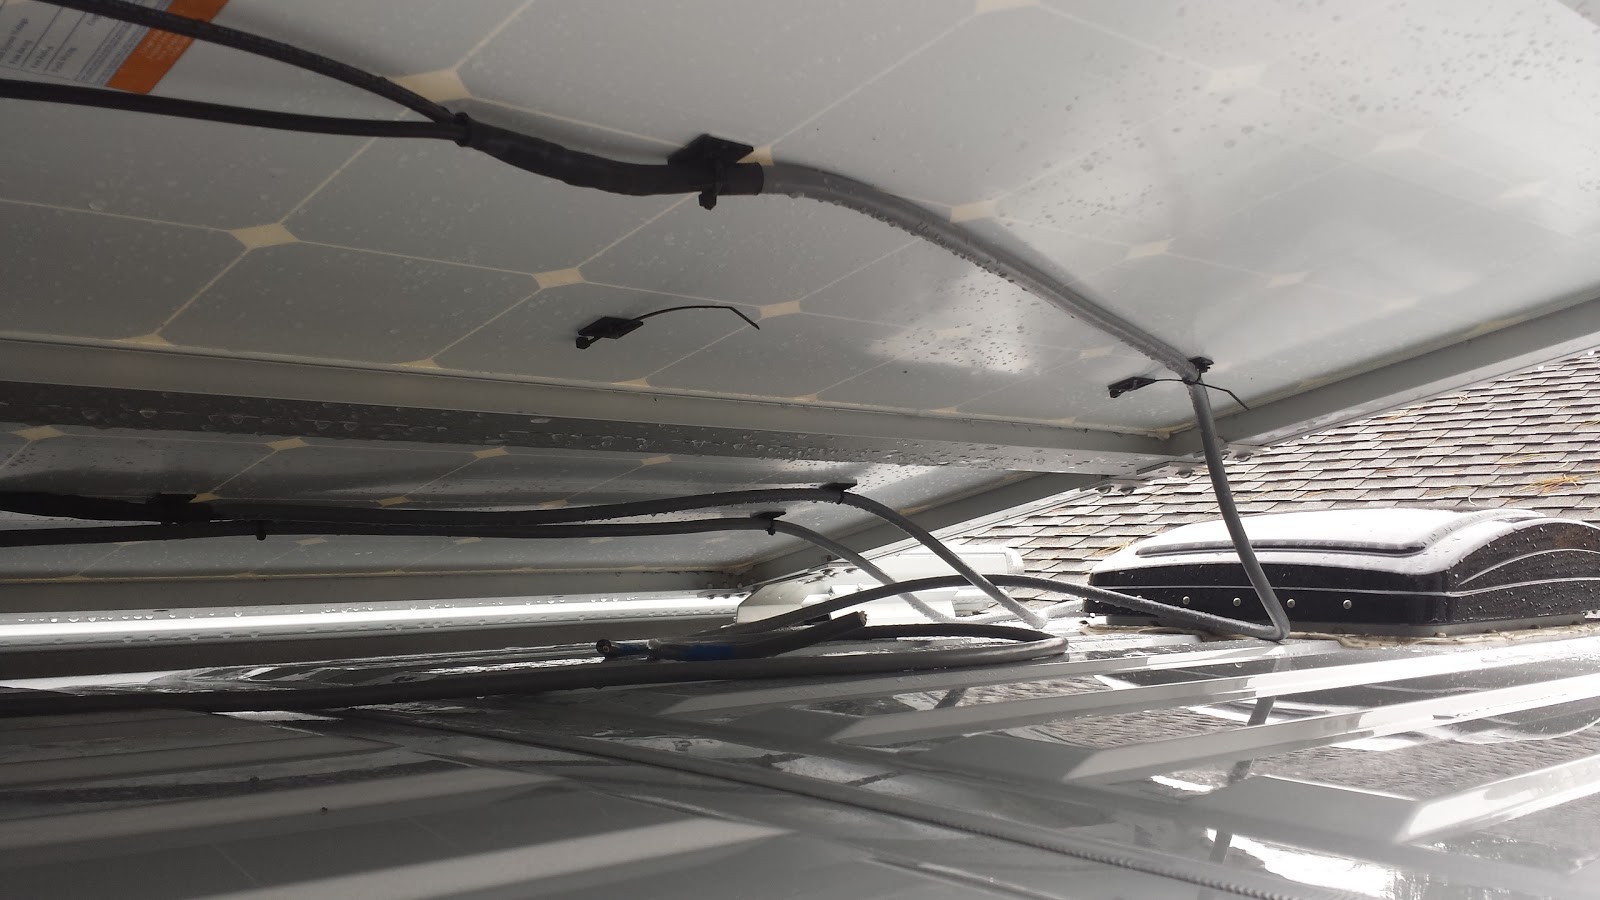
The view from underneath while trying to get the mounting bolts tight. You can see that each panels is secured by four tabs, with an extra tab in the middle to just support each a wee bit.
Panels secured, time to zip-tie the wiring up into place. For now they were just coiled up and left on the roof. The combiner box would be another day's project.
And finally, bringing it home, the view from our upstairs room. Again, starting to get a feel for just how crazy it was to install 640w of solar panels. We had specific requirements that drove us to that level, and they would prove to be quite true come summer of 2016. More on that later in the story.


No comments:
Post a Comment