So, with a general layout in my mind I did some more rough calculations on how much 80/20 I would be needing and placed the big order. I don't remember the cost, but fairly sure it was over $1k total, maybe $1.5k. Yeah, I know there's cheaper options... but this is what I wanted to play with.
Delivery time! These were 70-80 pounds apiece. I'm sure the UPS guy grumbled at me this day.
I knew there needed to be some decently organized storage for all this stuff. Didn't really have an empty wall to place the stuff, either vertical or horizontal. But I did have my recently built bike rack. Added some standard shelf brackets to the side and I now had storage copious linear feet of aluminum.
To this, and actually get started. Yeehaw! *gulp*
The first layout. As you'll see in future commentary, the plan is to fill in the space between the grid with polyiso foam board insulation and some rubber flooring, 1.5" total thickness to match the 15 series 80/20.
A quick turn of the camera to show the 'shop' that I'm working from. Its the middle bay of a three car garage. The bike rack is to the right, and the single bay with her car is to the left. Front and center is the main workhorse when messing about with 80/20. Miter saw with a non-ferrous carbide blade. Works great! But it does produce one helluva mess. The cardboard box to the back catches about 80% of the aluminum shavings, but there's still a big mess on the floor every time. I acquired the saw earlier in the year when I built a custom dog crate with 80/20. The idea was to get familiar with the stuff, see if its what I wanted to use in the van. Also seen is the drill press back on the workbench. It was bought for the BoB project. What good is a project if you don't get to acquire new tools?
Someday when I'm done working on BoB the workbench will get wheels and move over to store in the back and maybe, just maybe I'll get to park my car in the garage.
Yeah, that's me; with BoB in the background. Its been interesting at times working in there, as our driveway has a 6 degree (10%) slope. Extensive use of squares and measuring to check everything, not a single use of a level.
And here we go. The floor grid is assembled and bolted into place. I used elevator bolts from the backside of the plywood to angle brackets bolted to the floor grid. (elevator bolt: think carriage bolt but with a larger and flush fitting head) The plywood is bolted to the factory cargo tie downs. Nothing will be moving, thank you very much.
A closer look at how the floor grid is secured, along with the first wheelwell box. I've seen some nicely built curved boxes, or ones with access doors, but I'm hoping that this will be the majority of 'wasted space' that I have to deal with in BoB. And even now I still have plans to provide access into there for small items.
And here's a sequence of finishing the rear door sill for the floor grid. I knew that I would need a piece of 80/20 as a 'threshold' to protect the edge, so I went with a solid face to keep out the crud and just have a smoother appearance. The edge of the plywood was covered with a basic aluminum angle piece from Home Depot, with spacers of the same material to hold it all at the same height. Add in some of the Sikaflex adhesive left over from mounting the Fiamma awning, and again... this will not be moving.
Really getting excited by this point. I'm actually building something! And it looks good! Well, to me anyway.
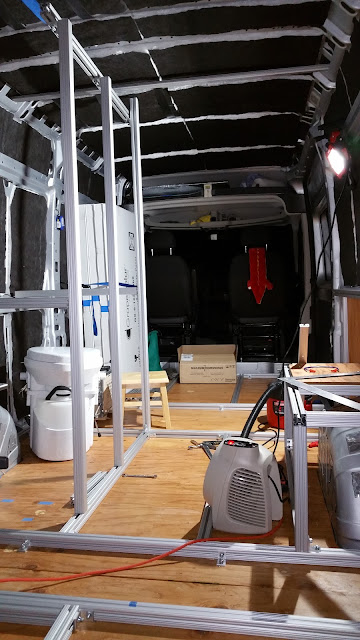
Time to start mocking up the interior. I had the other wheelwell built out by now. I knew it would be taking up valuable space in the bathroom area, so we had to see exactly how the composting toilet would fit. So in it goes... Hold up some plywood to emulate the wall, have someone take a seat, and find that it'll work well enough. Its not meant to be a spacious master bath with jacuzzi and a sauna, just someplace to do your business.
Building the first iteration of the bathroom walls. The plan is to have them stop just shy of the ceiling panels. One, to provide some ventilation to the bath/shower area; two, easier not to deal with another intersecting plane.
First test fit of the back panel for all my electrical goodies. More to come on that subject...
A couple fun shots through the back windows.


No comments:
Post a Comment